
Overview
Section 508 [of the Rehabilitation Act] requires that web content be equally accessible to people with disabilities – web applications, pages and all attached files; the requirements apply to course-based as well as public-facing pages that we create to support teaching and learning.
While universities are working to ensure that Learning Management Systems provide an overall accessible platform for sharing and creating content, the creating of learning-related documents posted to those LMSs is the responsibility of instructors, and often of peer learners in a classroom.
Laura Thrasher notes this in opening her post for by eduniverse.org:
“In higher education, maintaining a Section 508 compliant web presence is essential. However, many people assume that a website’s accessibility is the programmer’s responsibility. You might be surprised to learn that content can also impact accessibility. People with visual, hearing, motor, or cognitive disabilities need to navigate your website. Also, they need to understand your content. With attention to a few key areas, you create marketing content that is both high quality and accessible.”
As a teacher and blog editor – and frequently presenter on topics related to Universal Design for Learning – I’ve been working to learn how to create accessible documents using common software packages in both PC and Macintosh environments. As a forever user of Mac hardware, I have come around to using rather than neglecting the PC-side of my computer set up in order to more easily and fully create accessible word documents, presentation slidedecks with notes, images/tables/diagrams, blog posts, multimedia and HTML artifacts.
What’s a Teacher to Do?
Here I’m passing along – fully intact – the body of Thrasher’s “6 Tips for an Accessible Content Strategy.” As a designer for Formstack, “an online form building platform that makes it easy to capture and manage data” and former teacher of English at the University of Alabama, she writes with an awareness of the tools we use and the learners in our classrooms.
At the close of Thrasher’s six points, I’ll share a five quick tips that you could start using today, and point to four resources that I’ve collected with Tim Kamenar – one of our bloggers – in developing our various Universal Design for Learning presentations.
Thrasher’s 6 Tips:
1. Write clearly and simply.
Readers with cognitive disabilities may need additional explanation or clarity, and all readers like well-organized content. Write with a single main point to each paragraph. Include an introduction, support, and a conclusion. Your content should have a logical flow. You’ll also want to describe anything that is not text. This includes images, charts, videos, and audio presentations. For pictures, add captions that explain the image and its context. Doing so is helpful to all users, not just those with disabilities.
2. Provide text versions of infographics or images that include text.
Infographics are popular marketing tools. Unfortunately, they can render information inaccessible for users with disabilities. Screen readers and other assistive technology cannot “read” images. Include or link to a text-only version so screen readers or other devices can translate it to users with disabilities. Designers can abide by some simple guidelines when creating visual content, as well. Use high-contrast colors and avoid communicating meaning through color alone. If you’re unsure whether your visual content is accessible, there are online tools, such as http://www.508checker.com/, that will scan your page and determine compliance.
3. Include accessible online forms.
Many colleges and universities are rightfully concerned about their Section 508 compliance. Online forms are a place where inaccessibility is a significant problem. If users with disabilities cannot navigate online forms, there is a barrier. When creating online forms, include clear instructions. Use understandable field labels so that all users can navigate them. Even the submit button should be clear. For example, a scholarship application’s submit button could read, “Submit Application” rather than just “Submit.”
4. Use logical hyperlink text.
Your link text can help users with disabilities navigate your website. Phrases like “click here” or “more” do not communicate the function of the link. Some screen reader users jump from link to link on a webpage as a way to skim the text. If your hyperlinks all say “click here,” you are not giving them the information they need to navigate. Try to be as descriptive as possible when creating your link and tell users where your link will take them.
5. Supplement multimedia.
Can customers get all the important information from your videos and audio, even if they can’t see or hear? Include real-time captions for videos. If that’s not yet possible, provide transcripts. Transcripts don’t have to be word-for-word scripts; they can include information and descriptions that would be helpful to a viewer with disabilities. Transcripts are also searchable, which can help your web users find your content.
6. Use headings well.
Headings help users understand how a page is organized. When used correctly, their structure can also let users with disabilities better scan a page. If users have cognitive disabilities that affect reading or retention of information, headings also assist their ability to follow the organization of your content.
Our 5 Starting Out, Really Basic Tips
- Use an easily scannable font – Times New Roman, Verdana, Arial, Tahoma, Helvetica, Calibri.
- Make use of “Properties” in the File menu to complete the Summary section to create a searchable record of key document information.

Finding the toggle to call up “Properties” dialog box.
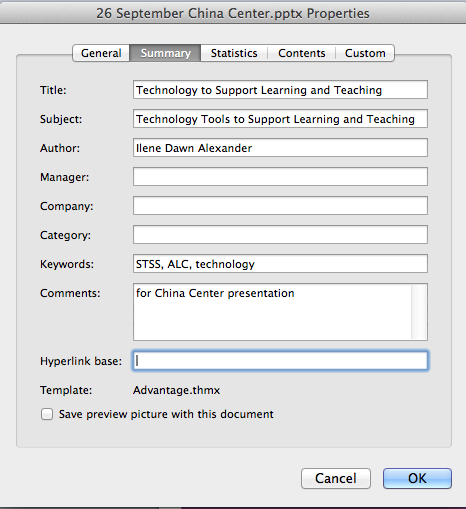
Properties dialog box
- Write meaningful Alt-Text description for images, diagrams, tables. This not only aids students using a screen reader to scan texts, it can aid overall student learning by providing image- and text-based information about key artifacts. Setting up alt-text in PC versions of Word and PowerPoint is easily done via Menus across the page. For Mac users, we recommend pointing to the image needing a textual update, then right clicking on the mouse to call up a dialog box that will include “Format Picture.” Choosing this option, you’ll be taken to a second dialog box where you can type in a title and alternative text explaining the image.

With cursor on an image, right Click to select “Format Picture.”

Format Picture dialog box close up.
- Save a genuinely final image of any Word document that you will share: accept or reject Track Changes suggestions, and resolve all Comments so that these are not hovering in a second layer of your document that readers can access via the Review tab. This is important both in terms of confidentiality – and in terms of removing potential confusion for a screen reader or human reader wondering which text to take into account.
- Never ever simply say “Click here” or “More here” as instructions to readers for accessing a URL or hyperlink. And always include the http:// stem in a URL address you type out. Do name the document so that someone could use a keyboard to search for – if not directly type in – the URL. A short title and the author can be a useful combination. Noting that you’ve also incorporated a hyperlink into a typed out title combines two modes of access. This helps in two ways – screen readers can’t “get to” the hyperlink beneath a “click here” message, and plenty of URL locations shift over time; providing title and author information increases odds of finding the resource with a keyboard search.
Our “Best of…” Resources
I’ve been changing my document formatting practices for the last year – and the people who’ve benefitted the most? All of my students. If links go bad overnight (which happens all to often), they have keywords for searching when they know I’m not likely to be online to troubleshoot. If images are complex, they have visual and verbal cues in the shared documents to supplement discussion and reading notes. If they are searching for documents, they can make use of keywords in document summaries and/or hashtags embedded in documents to gather resources. If they are using screen readers or adapting documents to their personalized formatting requirements (font size and type, for example), more often than not the class documents play nicely with student needs.
So, as I’ve been learning to be more intentional about making documents accessible over the past year, these are the most often “gone to” resources:
- Converting Word to PDF Resources:
- “Preparing Microsoft Documents for Conversion to Accessible PDF Files,” available at the following URL: http://www.ucop.edu/electronic-accessibility/_files/pdf-mac-2011.pdf.
- WebAim on “Creating Accessible Documents,” available at: http://webaim.org/techniques/word/.
- General Resource:
- Purdue University, “Tips for Creating Accessible Online Documents,” available at: http://www.purdue.edu/webaccessibility/resources/online_documents_tips.html.
- Purdue University, “Tips for Creating Accessible Online Documents,” available at: http://www.purdue.edu/webaccessibility/resources/online_documents_tips.html.
- Detailed Resource:
- US Department of Health and Human Services, “Making Files Accessible” – checklist, step-by-step directions, and videos on creating accessible PDFs, Word and Excel documents, PowerPoint slide and notes decks, multimedia and HTML artifacts, available at: http://www.hhs.gov/web/508/accessiblefiles/index.html.


Thank you for such a concise and helpful summary.
You’re welcome, Kit. My instinct, of course, is to include an emoticon here, but I’m still in the midst of selecting and alt-texting a set of icon images that I like, and can use in place of keyboarding them with punctuation marks. Just found this site – http://raisingthefloor.org/ – with its wonderful mission (Raising the Floor (RtF) is an international coalition of individuals and organizations working to ensure that the Internet, and everything available through it, is accessible to people experiencing accessibility barriers due to disability, literacy, or age.) and resources. For emoticons, for example: http://raisingthefloor.org/projects/features/emoticons.
Thanks very much for this great post! I am wondering how to get more specifics on what is meant by “If they are searching for documents, they have tags to gather resources”? – is that something you do with them within the course website, and do you provide additional instruction or notes that you have added keywords to your document metadata so they know they can use their local machine’s search function in these ways?
I’ve changed the wording within the text to reflect the intent we had in mind: ” If they are searching for documents, they can make use of keywords in document summaries and/or hashtags embedded in documents to gather resources.” The sentence refers to point #2, making use of “Properties” within a word document, and to a general practice of embedding targeted hashtags within documents as searching/keyword aids.
Reblogged this on WinAhead's World and commented:
This post at TILT is a good “plain English” overview of designing accessibly.
Thanks for the words!